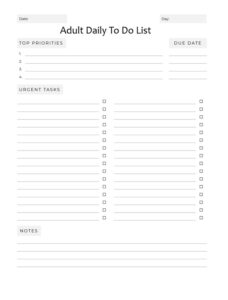
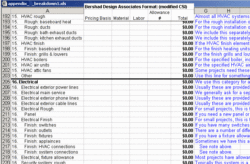
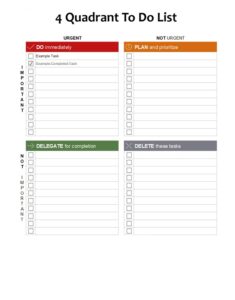
Moving into a new home is an incredibly exciting milestone, a culmination of dreams, decisions, and significant investment. As the final stages approach and that coveted set of keys is almost within reach, there’s one last critical step that often gets overlooked in the flurry of anticipation: the final walk-through. This isn’t just a casual stroll through your soon-to-be dwelling; it’s a vital opportunity to ensure everything is perfect, and having a new home construction punch list template by your side will make all the difference.
Think of your punch list as your last line of defense against minor imperfections or oversights. It’s the moment to meticulously check every nook and cranny, from the major appliances to the smallest paint touch-ups. Ensuring that every detail aligns with your expectations and the builder’s promises before you close on the property protects your investment and ensures a smoother, more enjoyable transition into your new life.
This article will guide you through understanding what a punch list entails, why it’s so important, and how to effectively create and utilize one during your new home’s final inspection. By being prepared, you can confidently address any issues and move into a home that truly meets your standards.
What is a Punch List and Why is it Essential for Your New Home?
A punch list is essentially a document compiled during the final walk-through of your new home, detailing items that need attention, repair, or completion by the builder before the closing date. It’s a formal record of any deficiencies, whether they’re cosmetic flaws, functional issues, or incomplete installations. While it might sound like an extra chore, it’s actually a powerful tool designed to protect you, the homeowner, and ensure you receive the quality you paid for.
The purpose isn’t to nitpick, but rather to ensure that the home is delivered in the condition specified in your contract and up to generally accepted industry standards. Builders often strive for perfection, but construction is a complex process involving many hands, and minor issues can easily be missed. Your fresh set of eyes, combined with a systematic approach, can catch these details.
Typically, this crucial walk-through happens just a few days or weeks before your scheduled closing. This timing allows the builder enough time to address the items on the punch list, while also giving you a final chance to confirm everything is resolved before the property officially becomes yours. It’s a collaborative process, aiming for mutual satisfaction.
Understanding the Purpose of Your Punch List
For you, the homeowner, the punch list serves as your final quality control check. It’s your opportunity to identify anything that isn’t quite right – perhaps a cabinet door that doesn’t close smoothly, a light fixture that isn’t working, or a patch of paint that needs a touch-up. Addressing these items now, while the builder is still responsible and before funds have been fully transferred, puts you in a much stronger position. Fixing issues post-closing can become a much more complicated and potentially costly affair.
It acts as a checklist for everything from major installations to the smallest cosmetic details. Think of it as the ultimate quality assurance for your significant investment. Ensuring everything is perfect now means less hassle and fewer surprises down the road, allowing you to settle into your new home with peace of mind.
Moreover, the punch list is a clear line of communication. It provides the builder with a precise list of tasks to complete, eliminating ambiguity and misunderstandings. When everyone is on the same page about what needs to be done, the process is much more efficient and less stressful for all parties involved.
What to Look For: A Comprehensive Approach
When you’re doing your walk-through, you’ll want to inspect every area. This includes both the interior and exterior of the home. Inside, check every room from ceilings to floors. Test all switches, outlets, and plumbing fixtures. Open and close all doors and windows, checking for proper operation and any damage to frames or glass. Look closely at paint finishes, flooring installations, countertops, and cabinetry for any scratches, chips, or imperfections.
Don’t forget the exterior. Inspect the grading around the foundation, ensure proper drainage, and check the landscaping. Look at the siding, roofline, gutters, and downspouts for any signs of damage or incomplete work. Test garage doors and exterior lighting. Even small details like missing doorknobs or uninstalled light bulbs should be noted. Every detail matters when it comes to the overall quality and longevity of your home.
Creating and Using Your New Home Construction Punch List Template Effectively
Preparing for your final walk-through is key to its success. Before you even step foot in the home, gather your contract, blueprints, and any change orders you made during construction. These documents serve as your guide to what the finished product should look like. It’s also a good idea to bring a camera or smartphone to document any findings, a notepad and pen, a small flashlight for dark areas, and perhaps even a tape measure. A thoughtful approach will make sure no stone is left unturned.
During the walk-through itself, take your time and be thorough. Don’t feel rushed. Systematically move from room to room, opening every cabinet, testing every faucet, and turning on every light. Don’t be afraid to get down on your hands and knees to inspect baseboards or look under sinks. When you find an issue, clearly describe it, mark its location, and take a photo. It’s always best to be precise to avoid any confusion later on.
Here are some common areas and items to pay close attention to:
- Check all walls and ceilings for paint consistency, cracks, or damage.
- Ensure all doors open, close, and latch properly, and that hardware is secure.
- Verify all windows operate smoothly, lock securely, and are free of cracks or scratches.
- Test all electrical outlets, light fixtures, and ceiling fans.
- Run water in all sinks, showers, and tubs, checking for leaks and proper drainage.
- Inspect all flooring (tile, hardwood, carpet) for imperfections, proper installation, and cleanliness.
- Examine countertops and cabinetry for scratches, alignment issues, and proper functionality.
- Check appliances for proper installation and operation.
- Inspect the exterior for proper grading, drainage, siding issues, and intact landscaping.
- Ensure all builder-provided services (e.g., HVAC, water heater) are operational.
After the Walkthrough: What Comes Next
Once you’ve completed your inspection and gathered all your notes and photos, formalize your findings into a clear, concise new home construction punch list template. Provide this organized list to your builder. Discuss the timeline for repairs and follow up regularly to ensure progress is being made. You might even schedule a re-walk-through to verify that all items have been satisfactorily addressed before your closing date.
By diligently using a punch list, you empower yourself to ensure that your new home meets the highest standards of quality and craftsmanship. It’s an essential step in safeguarding your investment and setting the stage for a wonderful, worry-free experience in your brand-new property.